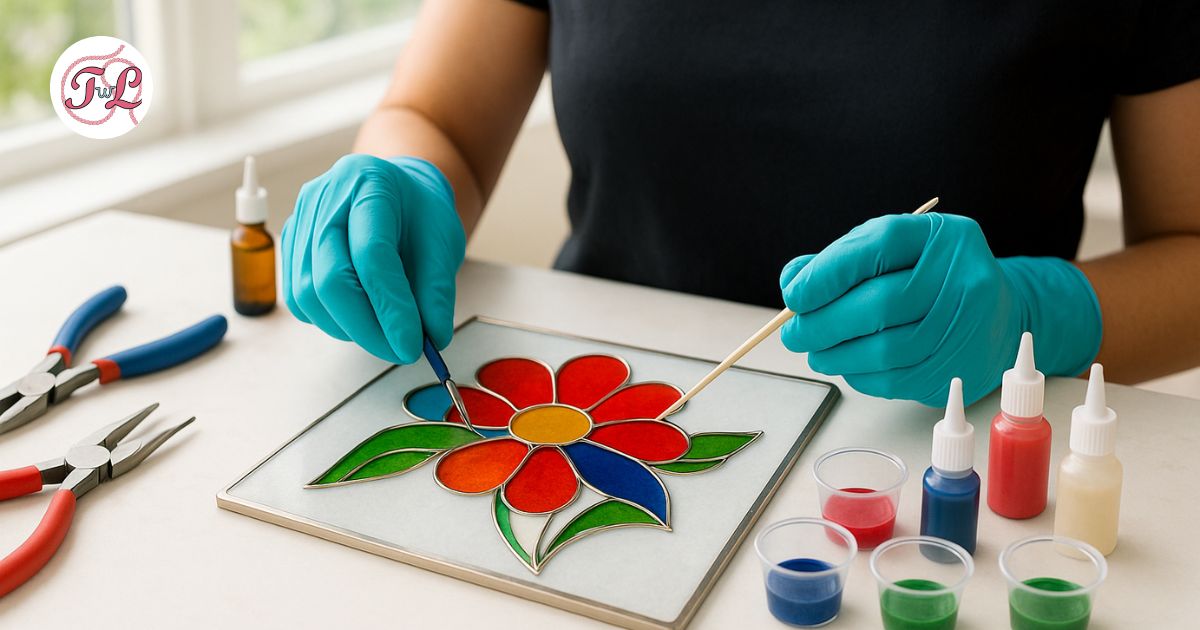
Why Try Modern Cloisonné?
Traditional cloisonné traps glossy enamel inside hair-thin metal walls, then bakes the piece in a red-hot kiln. Our “cold” version keeps the drama but ditches the heat. Thin wire outlines still form those gorgeous little cells, yet we fill them with resin or enamel paint that hardens at room temperature. Same jewel-like shine, much friendlier workspace.
Gather Your Essentials
A short shopping list is all you need.
| Item |
What to Look For |
| Base |
Flat wood, glass, tile, or metal, around 4–8 inches for a first project |
| Wire |
Soft copper, brass, or aluminum, about 18 gauge so it bends easily |
| Glue |
Super glue for fast tacks or E6000/B-7000 for wiggle time |
| Color Filler |
- UV or two-part epoxy resin plus tints
- Oil-based enamel paint or fresh nail polish
|
| Hand Tools |
Needle-nose pliers, flush cutters, toothpicks, gloves |
| Nice-to-Haves |
Mixing cups, clear top-coat resin, small level for resin pours |
Step-by-Step Overview
1. Shape and Place the Wire
Bend curves around a pen; pinch crisp angles with pliers. Snip flush ends so each compartment is closed. Dry-fit every piece on the sketch until the overall outline feels balanced.
2. Glue the Outline
Work a couple of inches at a time. A microscopic dot of glue under the wire is plenty; capillary action pulls it flat. Press each segment for a few seconds, then move on. Double-check for gaps where liquid could sneak through and seal them now.
3. Add Color
Resin route – Mix, tint, and drip resin into each cell until it kisses the wire edge. Pop stray bubbles with a toothpick or quick pass of heat. UV resin cures in minutes; epoxy takes a patient overnight.
Paint route – Brush on thin coats, letting each dry before the next. Two or three layers build an enamel-like depth without drips.
4. Cure and Finish
Leave the piece level and untouched until resin or paint hardens fully. For extra glassiness, flood everything with a clear resin topcoat once the colors set. Sand stray drips, polish exposed wire, and add hardware (magnet, bail, or backing) to turn your art into a gift-ready object.
Resin or Paint? Quick Pros and Cons
|
Resin |
Enamel Paint / Nail Polish |
| Finish |
Crystal clear or tinted dome |
Solid, glossy color |
| Speed |
UV cures in minutes; epoxy in 24 h |
Multiple coats, longer overall dry |
| Mess |
Sticky; gloves essential |
Easier cleanup, strong fumes |
| Durability |
Tough, scratch-resistant |
Good; add clear coat for heavy wear |
First Projects That Just Work
Start small so you’re learning, not wrestling. A heart pendant on a charm blank teaches wire bends and resin drops. A single-flower fridge magnet shows how colors sit side-by-side. Feel bolder? Outline an abstract swirl on a wood coaster, pour three jewel-bright resin shades, and topcoat for a table-ready accent.
Or spend an afternoon at our Vancouver studio, turning your own design into a vibrant art piece with all the tools, materials, and guidance you need.
Keep the Inspiration Flowing
Scroll #cloisonne or #resinwireart on Instagram for palettes and patterns. Watch a five-minute YouTube demo to see resin viscosity before you pour. Join a resin-craft Facebook group, real-time tips beat trial-and-error.
Parting Encouragement
Cloisonné wire art boils down to three calm moves: bend, glue, fill. Give each move patient, two-minute bursts of focus and the results look anything but beginner. When your first piece catches the light, you’ll understand why artisans have chased that glossy glow for centuries, now without ever firing a kiln.