Rug tufting is an addictive DIY craft, and our mind fills with happiness while painting yarns to create our own plush rug. But as any new tufter quickly learns, it’s easy to wind up with wonky rugs, threadbare spots, or a carpet-shaped disaster if you’re not careful.
In this guide, we’ll walk through the most common mistakes beginners make when tufting rugs and, more importantly, how to avoid them (with a wink and a smile). Grab your tufting gun and let’s turn those “oops” moments into aha moments!
1. Using the Wrong Backing Fabric
The Mistake: Opting for cheap or unsuitable fabric.
Why It Happens: Not all fabrics can withstand the force of a tufting gun. Thin or stretchy materials can rip or fail to hold yarn properly.
How to Avoid It:
- Use tufting-specific fabrics like monk’s cloth, primary tufting cloth, burlap, or linen.
- Avoid stretchy or loose-weave fabrics.
- Choose a cotton/poly blend for some give without losing shape.
- Test a small piece before starting your project.
- Ensure the fabric can hold yarn tightly without ripping.

Monk’s cloth (right, with yellow guiding lines) and burlap (left) are common tufting fabrics. Using a high-quality primary backing prevents your rug from distorting or shedding yarn.
Related: Tufting guide for beginners
2. Not Stretching the Fabric Tight Enough
The Mistake: Tufting on slack fabric.
Why It Happens: Loose fabric moves with the tufting gun, causing uneven loops and potential tears.
How to Avoid It:
- Use a sturdy frame with tack strips or grippers.
- Stretch fabric tightly across the frame until it’s drum-tight.
- Pull tight from opposite sides and smooth out wrinkles.
- Regularly check and adjust tension during tufting.
- Ensure your frame is stable and doesn’t wobble.
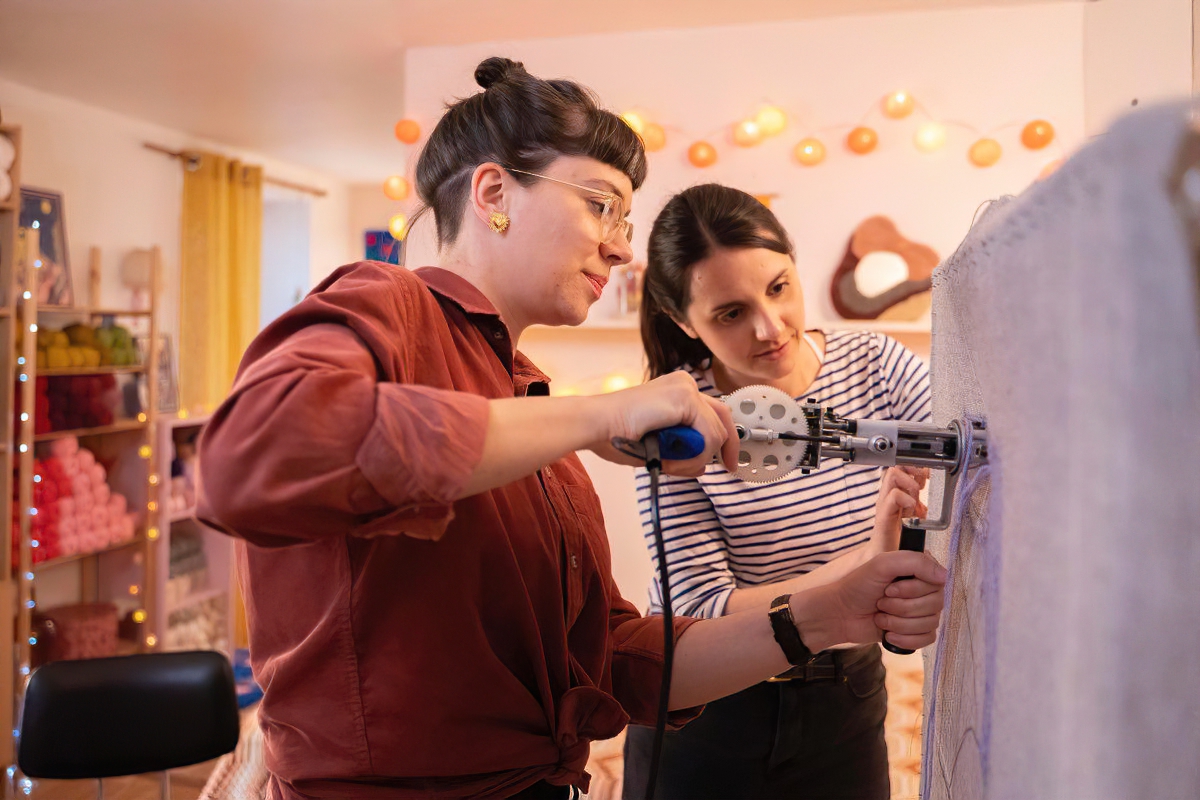
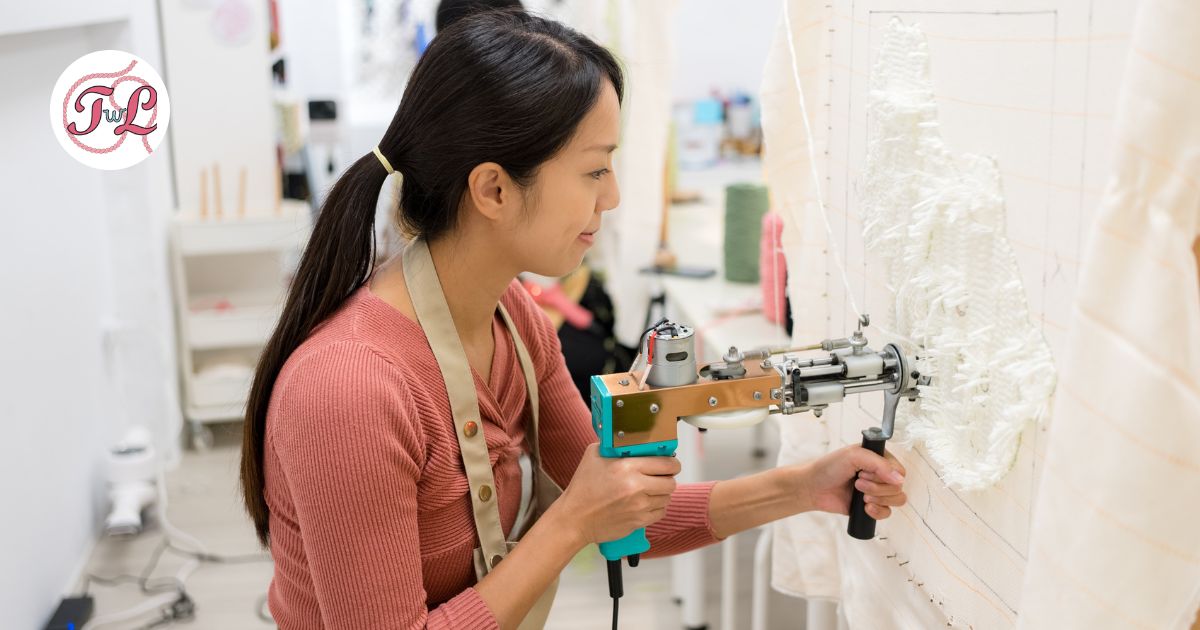
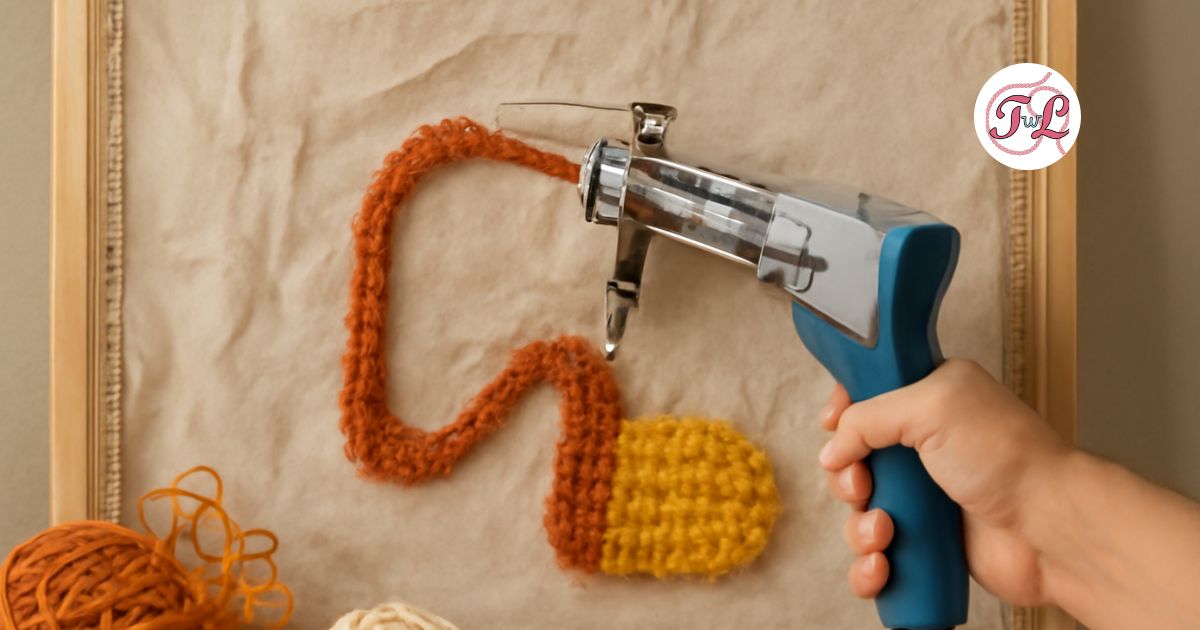
3. Improper Tufting Gun Technique
The Mistake: Holding the gun at odd angles or applying inconsistent pressure.
Why It Happens: Beginners may not fully understand how to operate the gun correctly.
How to Avoid It:
- Keep the gun at a 90° angle to the fabric.
- Apply steady, even pressure with the gun’s foot against the cloth.
- Move in the gun’s designed direction (usually forward).
- Stop and rotate the gun to change directions instead of dragging it sideways.
- Start and stop cleanly: insert the needle before pulling the trigger and stop the gun before pulling it out.
- Practice lines on scrap fabric to get used to the movement.
- Control the gun speed for better precision.

Keep the tufting gun at a consistent 90° angle and apply steady pressure when following your design outline. Moving the gun in its intended direction (in this case, upward along the drawn pattern) prevents the cloth from tearing.
4. Uneven Pile Height
The Mistake: A patchy rug with varying tuft heights.
Why It Happens: Inconsistent tufting speed, pressure, or gun settings.
How to Avoid It:
- Maintain consistent speed and pressure.
- Check and fix your tufting gun’s pile height settings.
- Make sure the cutting mechanism is working properly.
- Tuft methodically in rows.
- Trim the rug evenly after tufting using carpet shears or electric trimmers.
- Test on a small piece first to fine-tune your technique.
5. Inconsistent Yarn Tension
The Mistake: Yarn breaks or loops come out unevenly.
Why It Happens: Yarn catching on objects, poor feed setup, or improper threading.
How to Avoid It:
- Use a yarn guide or feed system (like a spool holder or eyelet).
- Avoid yarn pooling or tangling.
- Don’t pull on the yarn; let the gun feed it naturally.
- Use multiple strands if the yarn is too thin.
- Thread the gun properly.
- Watch and listen for tension changes while tufting.
6. Using the Wrong Type or Thickness of Yarn
The Mistake: Shedding, breaking yarn, or a rug with a strange texture.
Why It Happens: Using yarns not suited for tufting (e.g., too thin, too smooth, or too weak).
How to Avoid It:
- Choose the best yarn, medium-weight wool or acrylic yarn.
- Avoid delicate or loosely spun fibers.
- Test yarn strength before use.
- Match yarn thickness to your tufting gun and design.
- Buy enough of one dye lot to avoid color inconsistencies.
- Ask for recommendations from the tufting community.
7. Skipping Design Planning
The Mistake: Freehanding a design or misjudging scale.
Why It Happens: Impatience or lack of understanding about perspective while tufting.
How to Avoid It:
- Draw or project your design onto the backing cloth.
- Mirror image your design if working from the back.
- Plan your colors and label sections clearly.
- Stick to the template.
- Start with simple designs before attempting complex ones.
- Use printed outlines or transfer methods for accuracy.
8. Poor Yarn Management
The Mistake: Tangled yarn and color mix-ups.
Why It Happens: Yarn left loose, unmanaged, or mixed together on the floor.
How to Avoid It:
- Use yarn cones, bobbins, or containers.
- Feed yarn through guides to avoid tangling.
- Work with one color at a time when possible.
- Elevate or contain yarn to prevent snags.
- Use manageable lengths for feeding.
- Secure loose ends during color changes.
9. Overloading the Tufting Gun
The Mistake: Gun jams or damage from too much yarn.
Why It Happens: Feeding too many strands or using overly thick yarn.
How to Avoid It:
- Know your gun’s capacity and stay within it.
- Don’t force the gun if it jams – stop and clear the blockage.
- Maintain the gun (clean and oil it regularly).
- Take breaks to prevent overheating.
- Upgrade to a higher-powered gun if needed.
Also Read: Tufting gun comparison
10. Incorrect Glue Application
The Mistake: Tufts falling out or a rug that’s too stiff.
Why It Happens: Using the wrong glue, applying too much or too little, or not allowing enough drying time.
How to Avoid It:
- Use carpet adhesive or flexible latex-based glue.
- Apply thin, even coats using a putty knife or stiff brush.
- Avoid glue seeping through to the front.
- Let glue dry completely (24-48 hours).
- Apply two light coats instead of one heavy one.
- Secure yarn tails and press them into the glue.
 Spreading a thin, even layer of carpet adhesive on the back of a tufted piece. Applying glue in controlled layers ensures the yarn is secured without making the rug stiff.
11. Rushing the Process
The Mistake: Skipping steps, poor finishing, or not letting materials set properly.
Why It Happens: Impatience or excitement to see the finished product.
How to Avoid It:
- Take breaks to avoid fatigue.
- Follow each step thoroughly, especially during gluing and trimming.
- Let glue cure fully.
- Finish edges properly with binding or tape.
- Trim and inspect the rug before removing it from the frame.
- Reflect on what you can improve for next time.
Conclusion
Tufting a rug is a skill that pays off with patience, precision, and imagination. And yes, there’s going to be room for error as you learn; however, having the skills to stay clear of common tufting pitfalls makes the learning process more enjoyable and easier. With the proper skills and a little practice time, you’ll have beautiful handmade rugs in no time.
FAQs about Tufting
What type of fabric should I use for tufting?
Use monk’s cloth, primary tufting cloth, burlap, or linen. These fabrics are strong enough to handle the tufting process.
Why do my yarn loops keep falling out?
This may be due to poor fabric choice, incorrect glue application, or loose fabric tension. Ensure you’re using the right backing, stretching it tight, and applying glue properly.
Can I use any yarn for tufting?
No. Use medium-weight wool or acrylic yarn. Avoid overly thin, silky, or fragile yarns that break or shed.
How do I keep my yarn from tangling while tufting?
Organize your yarn using cones, bobbins, or containers. Use a yarn guide and feed system to keep it smooth and tangle-free.
How long should I wait for the glue to dry?
Allow the glue to dry completely, typically 24-48 hours. Do not rush this step to avoid loose tufts.
Do I need to trim the rug after tufting?
Yes. Trimming ensures an even pile height and a polished finish. Use sharp shears or an electric trimmer.
Should I add a backing to the rug after tufting?
Yes. Adding a secondary backing protects the glue and gives your rug a cleaner, more durable finish.
How do I fix a mistake while tufting?
Before gluing, you can pull out incorrect yarn with tweezers and re-tuft the section. After gluing, it’s more difficult to correct errors.