If you’ve ever wanted to create something unique for your home, tufting might be the perfect craft for you. This creative process allows you to design and make your own custom rugs, whether you’re a seasoned artist or a complete beginner.
With just a few essential tools and a little guidance, anyone can bring their rug designs to life. From simple shapes to intricate patterns, tufting is an accessible and enjoyable way to add a personal touch to your space.
Ready to dive in? Let’s explore how you can create your own DIY rug!
What is Rug Tufting?
Rug tufting is a popular and accessible technique used to create custom rugs by inserting yarn into a backing fabric using a tufting gun. This process forms loops or cuts in the fabric to create the rug’s design.
Unlike traditional hand-knotted rugs, tufting is faster and more straightforward, making it an ideal choice for both beginners and seasoned crafters.
The art of tufting dates back to the 19th century, but it became widely recognized in the 1950s when tufting machines were introduced to the textile industry, allowing for quicker production of rugs.
Today, it has become a beloved DIY craft, with people creating everything from small decorative rugs to large statement pieces for their homes.
What sets tufting apart from other rug-making techniques, like weaving or knotting, is its speed and accessibility. Weaving and knotting require advanced skills and can take weeks to complete even a small rug, while tufting allows anyone to create a rug in just a few hours.
The use of a tufting gun, which helps weave yarn into fabric, makes the process faster and more manageable for DIY enthusiasts.
Tufting has gained immense popularity in recent years as a DIY art form because it empowers individuals to design rugs that perfectly suit their personal style.
Whether you’re creating a rug as a gift, an art piece, or a functional addition to your home, tufting offers an exciting and creative way to express yourself.
Why Should You Try Rug Tufting?
Rug tufting isn’t just about creating beautiful, custom rugs—it’s also about the experience. There are plenty of reasons why you should try tufting, whether you’re a creative at heart or simply looking for a fun new hobby.
Here’s why tufting has become such a popular choice for DIYers:
Create Personalized, One-of-a-Kind Pieces
One of the most exciting aspects of tufting is the ability to design and create something truly unique. Whether you want a rug that matches your home décor, a custom piece with your favorite colors, or even a fun, quirky design, tufting allows you to bring your vision to life.
You’re not limited by mass-produced designs—you can make your rug as personalized and original as you want.
It’s a Therapeutic, Creative Outlet
Tufting is more than just a craft; it’s an enjoyable, therapeutic process. Many people find the repetitive motion of tufting calming, making it an excellent stress-relieving activity.
As you work on your rug, you’re also engaging in a form of creative expression that allows you to relax and let your ideas flow freely.
Accessible for Beginners
Unlike other rug-making techniques that require years of practice and specialized skills, tufting is relatively easy to learn. With the right tools and a little guidance, anyone can start tufting and see results quickly.
Whether you’re a first-timer or an experienced crafter, tufting is approachable, and you can start creating right away.
For those looking to get hands-on experience with expert support, Tufted With Love offers beginner-friendly tufting workshops that provide all the equipment and instruction you need to start confidently.
Enjoy the Process and the Final Product
Rug tufting offers instant gratification. As you work, you can watch your rug come to life in real-time. Whether it’s for your living room or as a gift, there’s no better feeling than seeing your handmade creation take shape.
Plus, you’ll have a functional piece of art that you can be proud of for years to come.
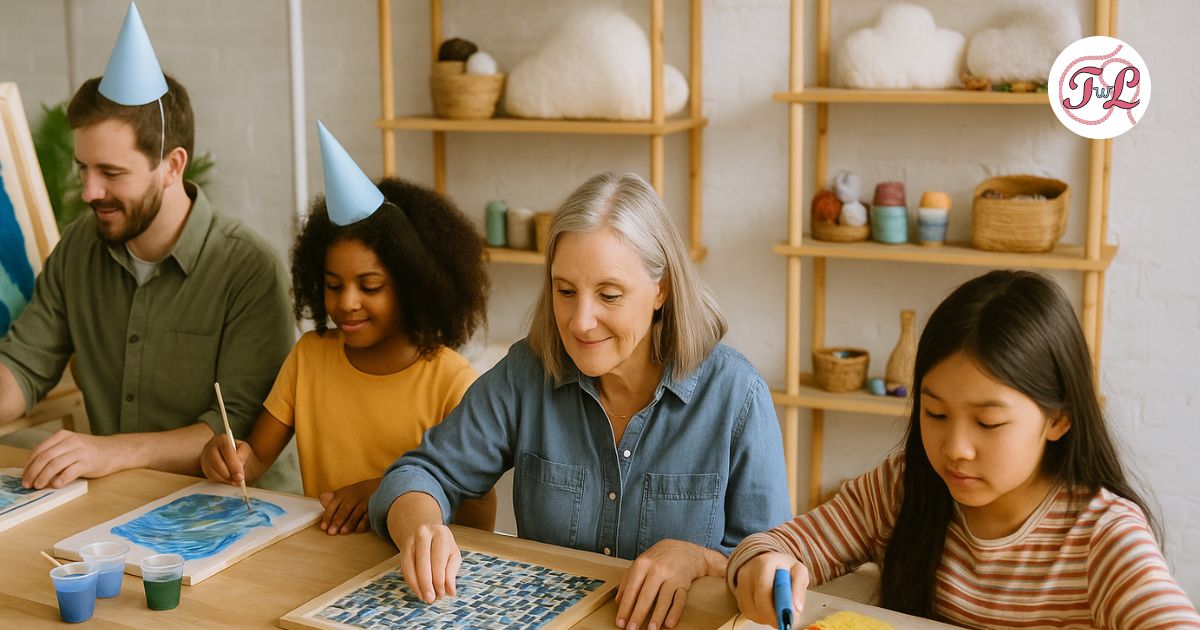
Fun for Groups and Special Occasions
Tufting is a fantastic group activity, making it perfect for workshops, parties, or family gatherings. Whether you’re planning a fun afternoon with friends or a team-building event, tufting can bring people together in a creative and enjoyable way.
It’s a hands-on experience that everyone can enjoy!
Check out Tufted With Love for guided group sessions—great for birthdays, team events, or creative outings.
The Tools and Materials You’ll Need for Your First Tufting Project
Before you start tufting, it’s essential to gather the right tools and materials. While the process is relatively simple, having quality supplies can make all the difference in achieving a beautiful, durable rug.
Here’s a breakdown of what you’ll need for your first tufting project:
Tufting Gun
The tufting gun is the key tool that makes tufting possible. It’s used to push the yarn through the backing fabric, creating the loops or cuts that form the rug’s design. Tufting guns come in two main types:
- Cut pile tufting guns: These create a short, dense pile by cutting the yarn loops. This is great for creating smooth, soft rugs.
- Loop pile tufting guns: These leave the yarn in loops, which results in a different texture, often used for more traditional rug designs.
When choosing a tufting gun, consider the size of your project and the type of texture you want to achieve.
Tufting Yarn
The yarn you use will have a significant impact on the texture and appearance of your rug. There are various types of yarn to choose from:
- Acrylic Yarn: Affordable, versatile, and comes in a variety of colors. It’s ideal for beginners and works well with tufting guns. Our acrylic yarn comes in 8-ply which allows for a fluffier, softer end result, perfect for vibrant designs.
- Wool Yarn: Offers a firmer, luxurious feel and is great for high-end, long-lasting rugs. It’s a little more expensive but provides a rich, natural texture. Our wool yarn comes in 3-ply, which allows yarn strands to hold their shape and provide unique texture and style.
- Blended Yarns: These are combinations of synthetic and natural fibers, offering the best of both worlds in terms of durability and softness.
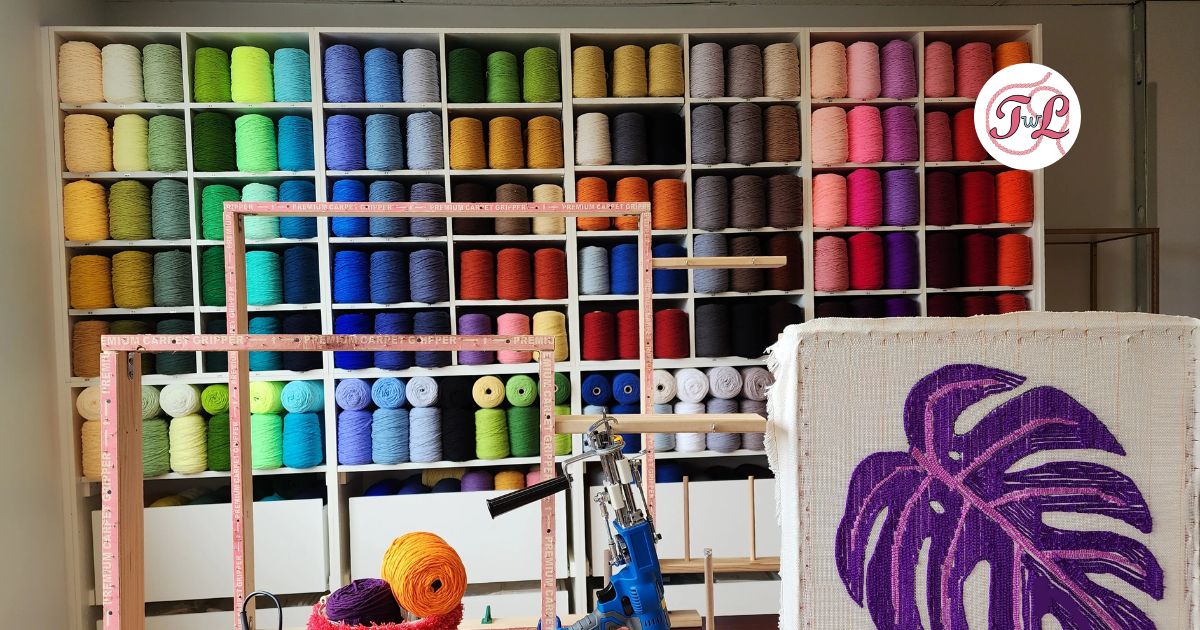
Tufting Frame
The tufting frame holds your fabric taut while you work, ensuring your design stays in place. The size of the frame depends on the size of the rug you want to create.
Tufting frames come in different sizes. You can choose to obtain a small frame to create one small project at a time, or you can opt for a larger frame for larger projects or to create several projects at once.
Primary Fabric
Primary fabric, also known as monk cloth, is the foundation of your rug. It provides a solid surface for the yarn to be tufted into. Most tufting projects use primary backing fabric, which is typically made from burlap or a similar sturdy material.
It’s important to use a fabric that’s both durable and easy to work with.
Clippers and Shavers
After tufting the yarn into the fabric, you’ll need clippers or a rug shaver to trim the yarn to your desired length. This helps refine the texture of the rug and gives it a professional finish.
- Rug shavers: These tools shave off excess yarn and give the rug a smooth, even surface.
- Clippers: Used to trim yarn for a more textured look, they’re perfect for creating custom heights in the pile.
Additional Tools
- Adhesive or Glue: To secure the yarn to the primary fabric.
- Secondary Backing: To provide a professional finish to your rug, covering the backside of glued yarn.
- Projector: Allows you to transfer a design onto your canvas easily by tracing it.
Explore our collection of tufting supplies, including tufting guns, premium yarns, and adjustable frames to get started on your rug-making journey. Find everything you need for your next DIY rug project!
Preparing Your Design and Materials
Once you have your tools ready, it’s time to dive into the fun part – designing your rug! Creating your own custom rug allows you to express your creativity while making something practical for your home.
Here’s how to prepare your design and materials for a successful tufting project:
Designing Your Rug
Start by sketching your design on paper or using a digital tool. You don’t need to be a professional artist to create a beautiful rug design – just let your creativity flow. Whether it’s a simple geometric pattern or a more intricate image, the possibilities are endless.
Alternatively, if you own a projector, you can choose an image on the computer, and project it on your fabric to immediately trace. Doing this allows you to transfer the design more accurately. In order for your design to turn out right, a crucial step is to invert the image before copying it.
If you’re just starting out, it is recommended to choose a design with bigger solid spaces and not a lot of details and outlines.
Choosing Your Colors
Choosing the right color palette for your rug can make all the difference. Think about the space where you’ll be placing your rug and the colors that will complement it. You can create contrast with bold colors or stick to neutral tones for a more minimalist look.
Here are some tips for selecting colors:
- Use a limited color palette: Too many colors can overwhelm the design. Stick to 3-5 main colors for a balanced look.
- Choose complementary colors: Consider using color theory to choose hues that work well together. For example, blue and orange are complementary, while analogous colors like blue and green blend harmoniously.
Transferring the Design to Your Frame
Once your design and colors are ready, it’s time to transfer the design onto your tufting frame. To do this:
- Position the backing fabric on the frame and tighten it until it’s taut.
- Trace the design onto the fabric using a fabric pen or chalk.
Take your time with this step – precision here will make the tufting process smoother and help you achieve the best results.
Step-by-Step Guide to Tufting Your Own Rug
Step 1: Setting Up Your Frame
Before you begin tufting, it’s essential to prepare your frame properly to ensure your fabric is taut and stable while you work. A well-secured frame makes the tufting process smoother and more enjoyable. Here’s how to get your frame ready:

- Choose the Right Frame Size: Select a frame size that suits the dimensions of your rug design. If you’re working on a larger rug, make sure your frame is sturdy and large enough to accommodate it.
- Attach the Primary Fabric: Lay your backing fabric flat on the frame. The fabric needs to be slightly larger than your frame to allow for space for you to hold the fabric to stretch it. Make sure it’s evenly positioned and taut. You want to avoid any sagging, as loose fabric can cause uneven tufting.
- Secure the Fabric: secure the edges of the Primary fabric. Start from one corner and work your way around, making sure the fabric remains tight but not overstretched. The goal is to have a smooth, firm surface to work with.

securing the fabric - Double-Check for Tension: The fabric should be tight enough that you can’t easily press down on it, but not so tight that it tears or distorts. If it’s too loose, your tufting gun won’t work properly, and if it’s too tight, it can warp the fabric. Once you have the tension just right, you’re all set to begin tufting!
Step 2: Threading the Tufting Gun
Now that your frame is ready, the next step is to thread your tufting gun properly. This ensures that the yarn flows smoothly and you can start tufting without any snags. Follow these simple steps to thread your tufting gun correctly:

- Thread the Yarn Through the Gun: Insert the yarn through the feed guide, ensuring that it flows freely without twisting. Pull it through until there’s a bit of slack (about 4-6 inches) hanging out of the back of the gun. This will give you enough length to start tufting.
- Double-Check: Ensure the yarn is feeding correctly before you begin tufting. If it’s jammed or caught anywhere, stop and correct it before moving forward.
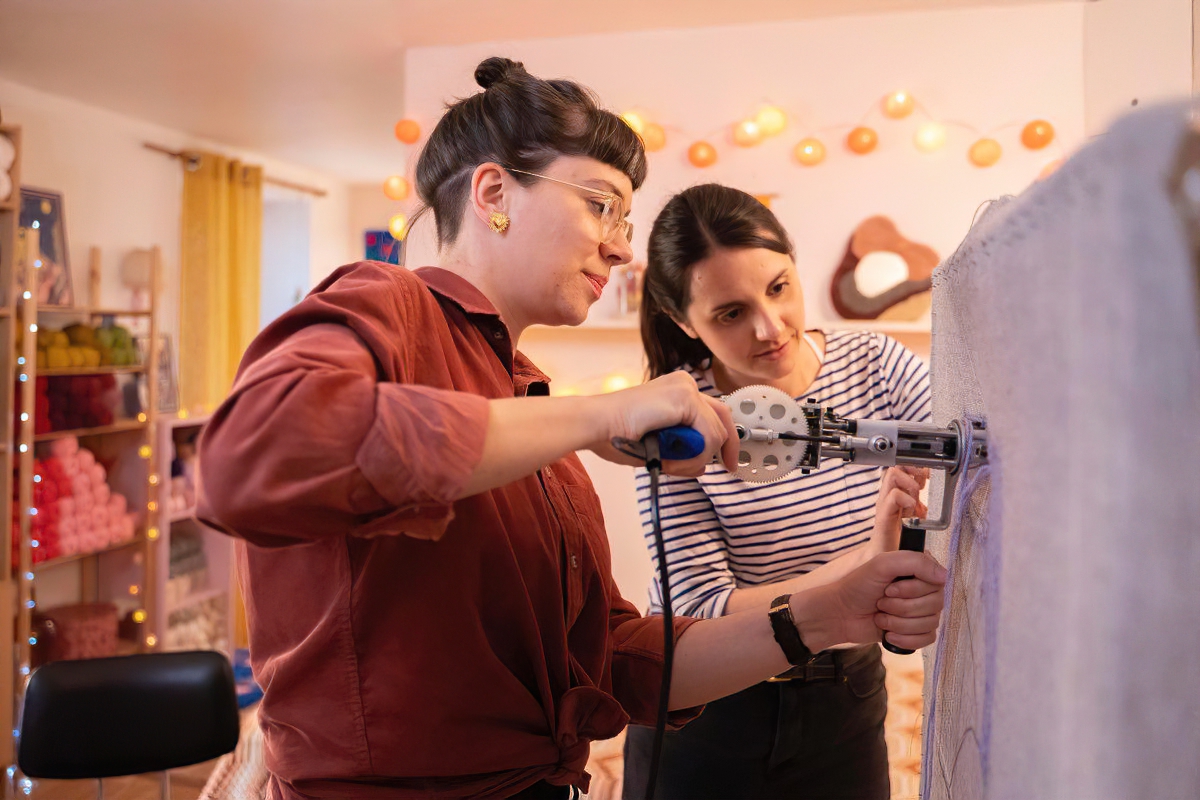
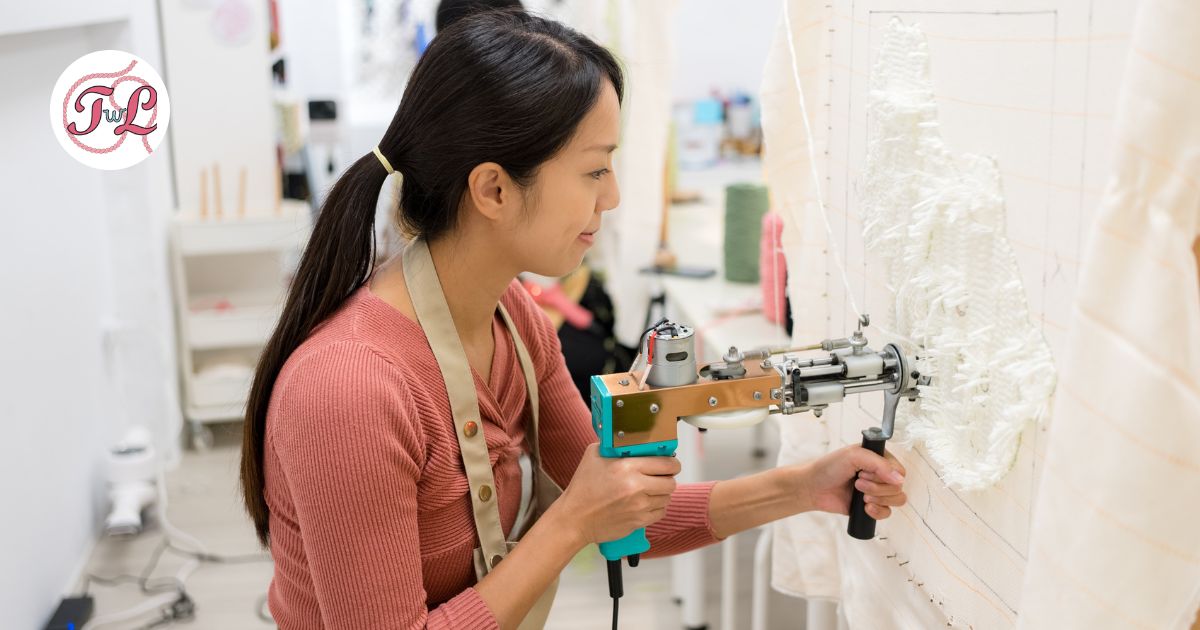
Step 3: Tufting the Rug
Now that your frame is set up and your tufting gun is threaded, it’s time to start tufting! This is where your design begins to come to life. Here’s how to use the tufting gun to create your first set of loops:
- Position the Tufting Gun: Hold the tufting gun with the nozzle facing down toward the fabric. Start at the edge of your design or in the middle, depending on what feels comfortable for you. Push the nozzle into the fabric and keep your hand steady. The front part of the machine needs to be fully inserted into the fabric and you need to maintain constant pressure while tufting.
- Pull the Trigger: Gently pull the trigger of the tufting gun to start the yarn feeding through the backing fabric. As the yarn comes through, it will form loops on the surface of the fabric.
- Maintain Consistent Speed: Keep a steady pace when using the tufting gun. Moving too fast can cause the loops to be too shallow, while moving too slowly might result in dense, bulky sections. Aim for even, consistent loops as you move through your design.
By the time you finish the first pass, you should have the beginnings of your rug design! Take a moment to admire your progress, then move on to filling in the rest of the design.
Step 4: Filling in the Design
Now that you’ve tufted your first set of loops, it’s time to fill in the rest of your design. This step requires patience and attention to detail to ensure your rug looks uniform and polished. Here are some tips for maintaining consistent tension and coverage as you fill in your design:
- Work in Small Sections: Start filling in your design one section at a time, especially if you’re working with complex patterns. This helps you focus on detail and ensures that each area is tufted evenly.
- Maintain constant pressure: It’s essential to maintain consistent pressure of the machine to the fabric while tufting.. If the tension is too loose, your loops may turn out too loose and may fall off, you might also risk ripping the fabric if you pull the trigger while not pressing the machine firmly into the fabric.
- DO NOT Overlap the Loops: As you work your way across the rug, make sure to to keep even spacing between the stitches to avoid overfilling the design.
- Check for Gaps: If you notice any areas where the yarn hasn’t fully covered the fabric at the front side of the design, don’t hesitate to go back and fill in the gaps.
- Switch Yarn Colors if Needed: If your design involves multiple colors, make sure to change the yarn color smoothly. Avoid overlapping colors as it would result in mixing of the colors. If overlapping happens, use tweezers to remove the mixed yarn colors.
Step 5: Securing your design
Once your design is fully tufted, and you have ensured that the rug is even with no gaps or overfilled spaces, it is time to add the adhesive to the back side of the rug.
Common types of adhesive include liquid latex and carpet adhesive. Using a scraper, scoop a small amount of adhesive and start spreading it on the backside of the rug. Add a thin layer of adhesive over the whole rug. Adding too much will prolong the drying time, so make sure to add a thin even layer.
Allow the adhesive to dry. You can either leave it to air dry, or use a fan or heat gun to speed up the process.
Step 6: Cutting and Trimming the Rug
Once the adhesive fully dries, it’s time to cut and trim your rug to perfection.
Cutting the rug out of the frame
- After removing the primary fabric with your tufted rug off the frame, cut the excess fabric from around the design.
Applying Backing Fabric
- Cut the Backing Fabric to Size:
Measure and cut a piece of backing fabric that’s slightly larger than your rug design. This will ensure that the fabric is secure on all sides and provides enough room for binding. - Apply Adhesive or Glue:
To secure the backing fabric to your rug, apply a thin layer of fabric glue or adhesive on the back of the rug. Be sure to spread it evenly so the fabric doesn’t shift once applied. If you’re working with a larger rug, you can also use a hot glue gun for more control. - Press the Backing Fabric:
Lay the backing fabric on the back of your rug, making sure it aligns with the edges and covers the entire surface. Press it down firmly, smoothing out any air bubbles or wrinkles. Leave it to dry for several hours or as per the instructions on your adhesive.
- To give your rug a finished look, cut a backing fabric to the shape of the design, and using a spray adhesive, attach the backing to the rug.
Shaving the Surface:
After cutting, use a rug shaver or electric trimmer to smooth the surface of your rug. Shaving helps remove any excess yarn that sticks out unevenly and gives the rug a polished, velvety texture.
- Shave in one direction: Move the shaver in a consistent direction, ensuring the pile remains even and free from stray fibers.
Trimming the Edges:
- The edges of your rug may require extra attention. If there are any loose yarn strands, use your scissors to trim them neatly. Make sure the edges are clean and straight for a finished look.
- For a more professional touch, you can also bind the edges of your rug by hand, using a sturdy fabric and stitching it in place.
Vacuum the Rug:
- After trimming and shaving, use a vacuum cleaner to remove any loose yarn fibers from the surface. This will leave your rug looking fresh and ready for display.
The trimming and cutting process can take time, but it’s worth it for the final results. A well-trimmed rug will have a clean, sharp appearance, and the yarn will have a beautiful, uniform texture.
Shaving and Trimming for a Smooth Finish
The final touch is to trim and shave your rug to perfection. This step ensures that your rug has an even, smooth surface and gives it a polished, professional finish. Here’s how to complete the process:
1. Trim the Yarn:
Using sharp scissors or a rug shaver, carefully trim any longer yarn strands that might stick out. Ensure that all the yarn is the same length to achieve an even pile height. If you’re working with a cut pile, make sure the yarn is cut to the same level to avoid uneven sections.
2. Shave the Surface:
After trimming, use a rug shaver or electric trimmer to smooth the surface of the rug. Shaving removes any excess fuzz or stray fibers and ensures that the yarn is uniformly even. Work in small sections, shaving gently to avoid damaging the yarn.
3. Check for Consistency:
As you shave and trim, regularly check the surface for any uneven patches. This ensures that the texture and pile height remain consistent across the entire rug.
-
Vacuum the Rug:
Once the trimming and shaving are complete, vacuum the rug to remove any loose fibers. This will leave the rug looking fresh and ready for use. If necessary, you can also use a fabric brush to gently brush the pile for a final smooth finish.
By following these final steps, your tufted rug will not only look professionally made but also be durable enough for everyday use. Proper backing, binding, and trimming ensure that your rug stands the test of time while maintaining its beauty.
Common Mistakes to Avoid When Tufting Your Rug
As with any DIY craft, tufting can present a few challenges along the way. While it’s an enjoyable and rewarding process, there are some common mistakes that can lead to less-than-perfect results. Here are some of the most common mistakes to avoid, and tips for overcoming them:
1. Inconsistent Tension
One of the most common issues in tufting is inconsistent tension on the yarn. If the fabric is too loose or too tight, the loops may be uneven, and your design may look messy.
How to avoid it:
- Always ensure the fabric is taut but not over-stretched.
- Adjust the tension settings on your tufting gun to suit the yarn you’re using.
- Take your time to check for tension consistency as you tuft each section, and adjust accordingly.
2. Choosing the Wrong Yarn
Not all yarns are suitable for tufting. Using the wrong type of yarn can result in a rug that’s too stiff, too loose, or simply doesn’t hold up well over time.
How to avoid it:
- Stick to yarns designed for tufting, such as acrylic yarn for beginners or wool yarn for a more luxurious finish.
- Make sure the yarn is thick enough to create the desired texture, but not so thick that it clogs the tufting gun.
3. Poor Frame Setup
If your frame isn’t properly secured or positioned, it can cause the fabric to shift while you’re tufting, leading to uneven loops or missed areas.
How to avoid it:
- Double-check that the frame is stable and the fabric is tightly stretched before you begin tufting.
- If you’re working on a larger rug, consider using a more robust frame that can withstand the tension required for a larger design.
4. Rushing the Final Steps
It’s easy to get excited about finishing your rug, but rushing through the final steps—like trimming, binding, and applying the backing—can result in an unfinished, uneven look.
How to avoid it:
- Take your time during the trimming and finishing steps. These are the key to achieving a polished, professional rug.
- Don’t skip the vacuuming and shaving stages – these will ensure your rug looks clean and sleek.
5. Forgetting to Check for Gaps
Leaving gaps in your design can affect the durability and appearance of your rug. If you miss spots during tufting or leave areas uncovered, your rug might look incomplete.
How to avoid it:
- Keep an eye on your design as you tuft. If you see any gaps or missed spots, go back and fill them in before moving on to the next section.
- Ensure consistent yarn coverage to avoid any bare patches in your final design.
6. Not Using Enough Yarn
It can be tempting to use small amounts of yarn to save on costs, but this can lead to a rug that looks sparse or fragile. Insufficient yarn can also affect the overall look and feel of the rug.
How to avoid it:
- Don’t skimp on yarn—make sure to use enough to fill the design without gaps or thinning areas.
- If you’re working with different colors, have extra yarn on hand in case you run out unexpectedly.
Avoiding these common mistakes will ensure that your tufting project is smooth and the final result is something you’ll be proud of. Taking the time to properly set up your workspace, maintain consistent tension, and finish your rug with care will pay off in the end with a beautiful, professional-looking piece.
Tips for Perfecting Your Tufting Skills
Once you’ve completed your first tufted rug, you might be eager to perfect your technique and try more complex designs. Here are some tips for improving your tufting skills:
1. Start Simple
For your first rug, it’s best to stick to simple shapes and designs. This will help you get comfortable with the tufting gun and learn how to manage tension, speed, and yarn types.
2. Practice Makes Perfect
The more you tuft, the better you’ll get! Don’t be discouraged if your first few rugs aren’t perfect. Practice will help you refine your technique and develop a sense of how to control the yarn, pressure, and design.
3. Take Your Time
Tufting is an enjoyable and relaxing activity. Don’t rush through it. Whether it’s your first or fiftieth rug, take your time to ensure each section is perfect before moving on. The process is just as rewarding as the final product.
4. Watch Tutorials and Learn from Others
There are many great tufting tutorials online, including video tutorials and workshops. Don’t hesitate to watch and learn from others. Joining online tufting communities can also provide inspiration and tips from experienced crafters.
Conclusion: Enjoy the Process of Crafting Your Own Unique Rug!
Congratulations on making it through the process of tufting your own rug! By now, you’ve learned the essential steps to create a beautiful, personalized piece of art for your home. From setting up your frame to adding finishing touches, each step has brought you closer to mastering the art of tufting.
Remember, tufting is not just about creating a rug—it’s about enjoying the creative process and expressing your personal style. With a little practice, you’ll be able to make rugs that are not only beautiful but also functional works of art. So, go ahead—start your next tufting project, experiment with new designs, and keep enjoying the journey of creating unique, handmade rugs!
FAQs about tufting
-
How long does it take to complete a tufted rug?
The time it takes to complete a tufted rug depends on the size and complexity of the design. Small rugs can take a few hours, while larger, more intricate designs may take several days.
-
Can beginners make tufted rugs?
Absolutely! Tufting is beginner-friendly and offers instant results. With a little practice and the right tools, anyone can create a beautiful rug. You can visit our studio for a guided tufting session
-
What type of frame should I use for tufting?
For beginners, a sturdy wooden frame with adjustable tension is ideal. Make sure the frame is large enough to accommodate your design and can hold the fabric tightly in place.
-
How do I maintain my tufted rug after completing it?
To keep your tufted rug in good condition, regularly vacuum it to remove dirt and dust. You can also spot clean stains, but avoid soaking the rug in water. Consider adding a rug pad underneath for extra durability.